.png?height=120&name=OmniByte%20-%20PNG%20Black%20Logo%20Oct%202021%20(1).png)
How to pass forms data to Azure Logic apps and Microsoft Flow
Use the available integrations in Azure Logic Apps and/or Microsoft Flow to use data from submitted forms in any of the applications available. Because there are so many available options with these applications, the information contained here is how to use the data map in FormsPro to integrate. We recommend using documentation from Microsoft in conjunction with this to fully integrate the data.
- Open the form for which you want to create a data map.
- Choose
 (Form Settings), then scroll to the right and click the Data Maps tab.
 - Click
 (Add button) to open the Data Mapping window.
- Choose Azure Logic Apps/Microsoft Flow as the data connection.
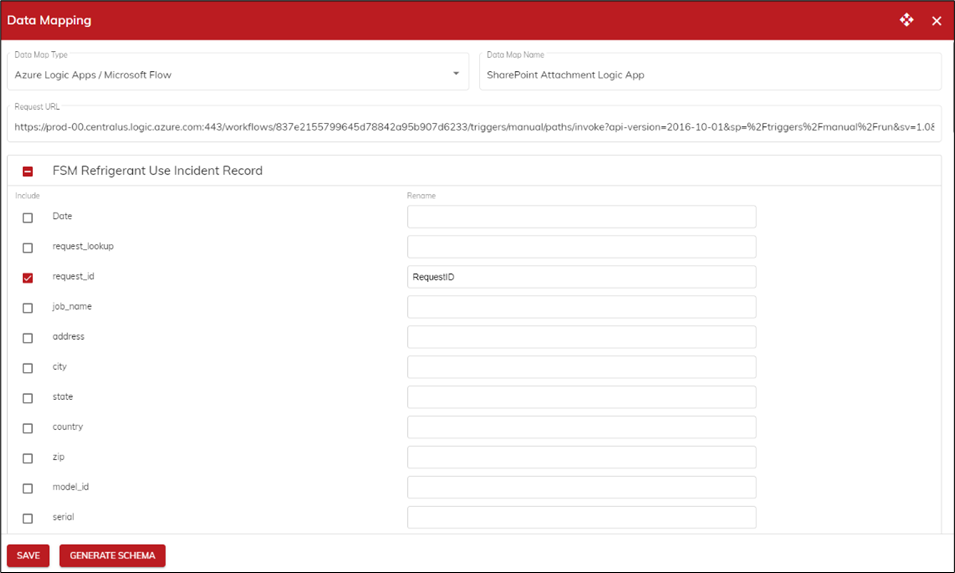
- Name your form map. The form map is the name for the set of information you’re mapping. Because you can create multiple maps for each form, use a name that helps you identify the information in the map.
- Copy and paste the POST URL from your Azure Logic app into the Request URL field.
- Select any reports you want to attach with the data in other applications.
- Select the fields you want to include in the data in the other application. You don’t need to add all the fields and, because you can create multiple maps for each form, you can create an Azure Logic Apps/Microsoft Flow connection for some fields on your form and a separate one for others. If you know what you’ll be using the data for, it will help you create an appropriate map. For example, if you’re reporting on how many times a day a specific form is submitted, you don’t need all the data from the form on the map, you’ll only need the date, AnswerID and FormName that’s at the bottom of the Data Mapping window.
- You can rename any fields for use in the other application. We recommend shortening long form field names to a few words, such as when you use a long question as a field name but need to report on that data collected. You can’t use the same name twice in a data map, so if your form has multiple tables with the same labels, you’ll need to be careful when renaming.
- Once you have the fields you want selected, click Generate Schema to open the Data Mapping window. Click Copy to copy the data to paste into the Logic Apps or Microsoft Flow application you’re also setting up.

- Click Save, then click OK to close the Form Settings window.
Your map is set up and you can complete the integration in the other application. When forms are submitted, you should see data from the form appearing in the integrating application. - View the Data Maps Log to ensure the data map ran successfully. We recommend that you specify an email to send the Data Map event error log reports to ensure the right personnel is aware of the errors and failures.