![OmniByte - PNG Black Logo Oct 2021 (1).png]](https://help.omnibyte.com/hs-fs/hubfs/OmniByte%20-%20PNG%20Black%20Logo%20Oct%202021%20(1).png?height=50&name=OmniByte%20-%20PNG%20Black%20Logo%20Oct%202021%20(1).png)
Users can be added directly, or they can be synchronized from Entra ID using an App Registration. The following article walks through creating an app registration. You need admin privileges in Azure to create an app registration. Follow these 5 simple steps to create the App Registration and sync users.
Creating the App Registration for Single Sign-On
Assigning Permissions to the App Registration
Granting Administrator Consent to Use Microsoft Graph APIs
Creating the App Registration for Single Sign-On
- In Azure, search for the App registrations menu.
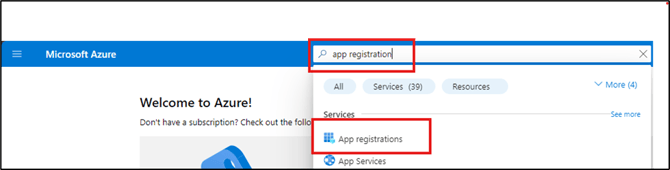
- Click + New registration.

- Complete the application details.
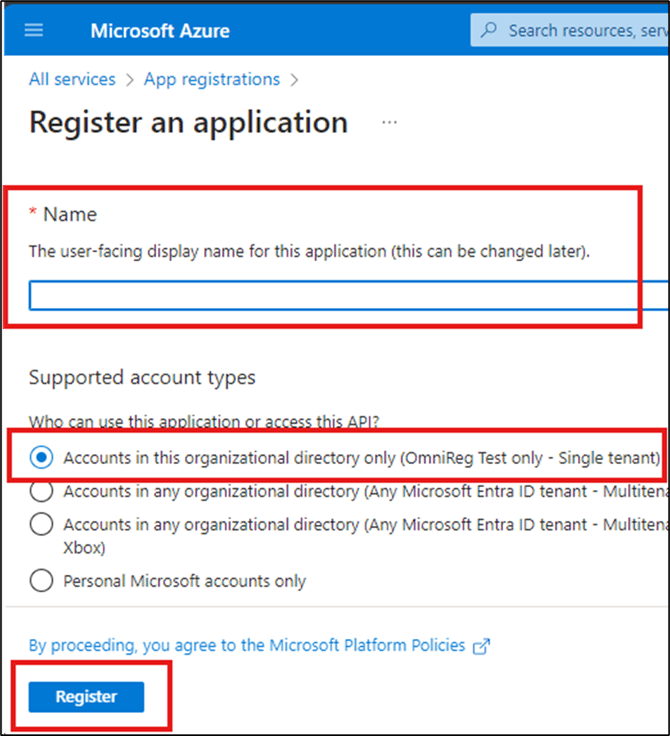
- Enter a name for the app registration. For example, "FormsPro Azure Active Directory Service."
- From the Supported account types list, leave Accounts in this organizational directory only marked.
- Click Register.
Adding Redirect URIs
Once a user is authenticated, Entra ID provides a token to the user to access the application. This token is provided by the redirect URI. For security reasons, you must create a redirect URI for your app registration to allow users to log into your application.
The app registration needs to be configured for each platform you will deploy in your environment. The following table provides more details about the apps and platforms to configure in the app registration.
⚠️ The admin and web app need to be configured as a Single Page Application.
|
App |
Description |
Azure Platform |
Configuration Value |
|
Admin App |
The FormsPro admin application to create forms and manage users. |
Single Page Application |
https://[FORMS_PRO_INSTANCE].com/login
|
|
Web App |
App used in the browser to create submissions. |
Single Page Application |
https://[FORMS_PRO_INSTANCE].com/app/login |
|
iOS App |
iOS app installed on devices to create submissions. |
iOS App |
FormsPro Package name: Redirect URI: msauth.com.omnibyte.forms://auth |
|
Android App |
Android app installed on devices to create submissions. |
Android App |
Package name: com.omnibyte.forms Advanced Forms Package Name: Signature hash: ga0RGNYHvNM5d0SLGQfpQWAPGJ8= |
|
Windows App |
The Windows App that can be installed to create submissions. |
Mobile and desktop applications |
http://localhost |
- On the Overview tab for your app registration, click the Add a Redirect URI link.
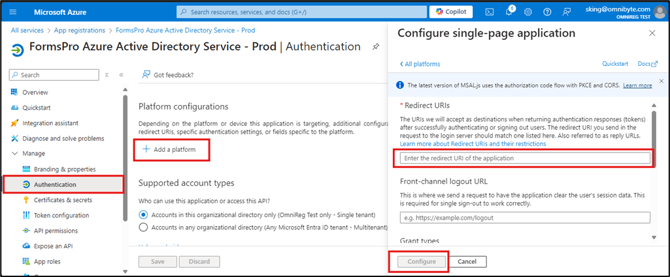
- Click + Add a platform.
- Select the applicable platform to create a redirect URI.
- Enter the redirect URI of the application.
- Click Configure.
Creating Client Secrets
A client secret is used to ensure the application requesting the token created earlier, is the application that originated the request. This is required for the client to authenticate with the server.
- Click the Certificates & secrets blade.
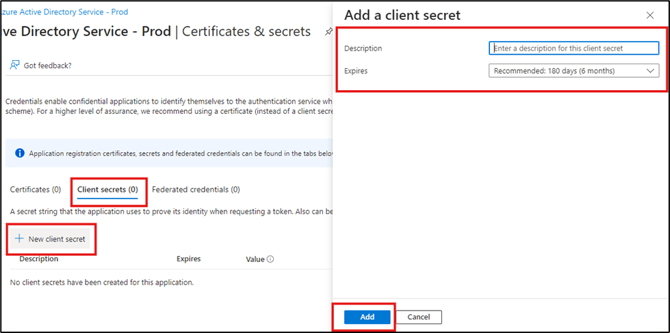
- Click the Client secrets tab.
- Click + New client secret.
- Enter a description for the client secret. This field should describe what the client secret is. For example, "FormsPro SSO."
- From the Expires list, select the duration of the certificate. The default is 180 days. This may vary depending on your organization’s security requirements.
- Click Add.
⚠️ Once you’ve created the client secret you have one chance to copy and paste the Value and Secret ID. After you refresh or navigate away from this page, you will not be able to see these keys again. Copy and paste these values into your password manager so they can be used in the future. The Value key is what will be used to configure SSO in FormsPro.
⚠️ You must create a new client secret before the current client secret expires. You will also need to update this client secret in the FormsPro or Advanced Forms. Not doing so may cause service interruptions to your application.
Assigning Permissions to the App Registration
Configure the necessary permissions for your app registration.
- Click the API permissions blade for your app registration.
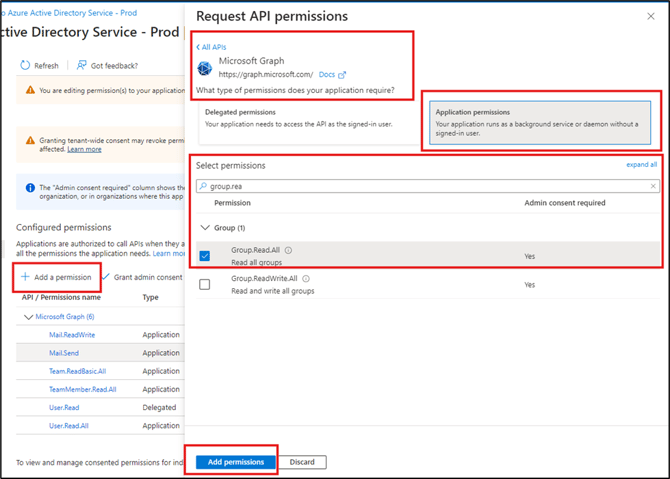
- Click + Add a permission.
- Click Microsoft Graph.
- Click Application permissions.
- Select the following permissions by either searching for the permissions or selecting them in each Permission menu.
Permission Application Reference Group.Read.All This permission is to read the groups in an Entra ID environment. Group.Read.All Team.ReadBasic.All This permission is for reading teams from Microsoft Teams, rather than groups in Azure Entra ID. Team.ReadBasic.All TeamMember.Read.All This permission is for team members that may only exist in Microsoft Teams. TeamMember.Read.All User.Read This permission allows the application to read basic information about the signed in user. User.Read User.Read.All This permission allows the application to read the full profile of a signed-in user. It is needed for syncing specific users. User.Read.All - Click Add permissions.
Granting Administrator Consent to Use Microsoft Graph APIs
The last part of the app registration is to grant administrator consent to use the Microsoft Graph APIs for the application.
- Click the API permissions blade of your app registration. You will see the list of permissions from the previous steps.
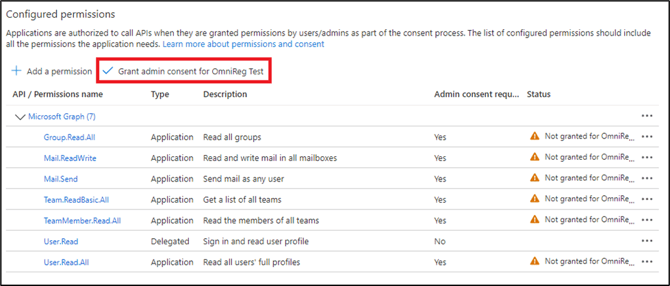
- Click Grant admin consent for your Azure tenant ID. Notice in the following illustration the status is Granted.

- Your app registration is complete! Continue by configuring single sign-on settings.