![OmniByte - PNG Black Logo Oct 2021 (1).png]](https://help.omnibyte.com/hs-fs/hubfs/OmniByte%20-%20PNG%20Black%20Logo%20Oct%202021%20(1).png?height=50&name=OmniByte%20-%20PNG%20Black%20Logo%20Oct%202021%20(1).png)
A Data Warehouse data map helps you organize your form data into structured SQL tables that are accessible directly from your organization’s SQL database. It allows you to define how form data should be stored by mapping form fields to SQL table columns. Once configured, each form submission is automatically saved to the database, where it can be queried, searched, and analyzed just like any other data in your relational database.
- Open the form for which you want to create a data map.
- Click on
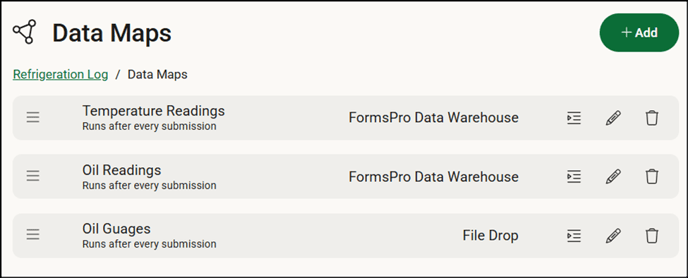
 (Connect), then choose Data Maps to open the Data Maps page.
 - Click + Add to open the Data Mapping window.

- From the Data Map Type list, choose FormsPro/Advanced Forms Data Warehouse.
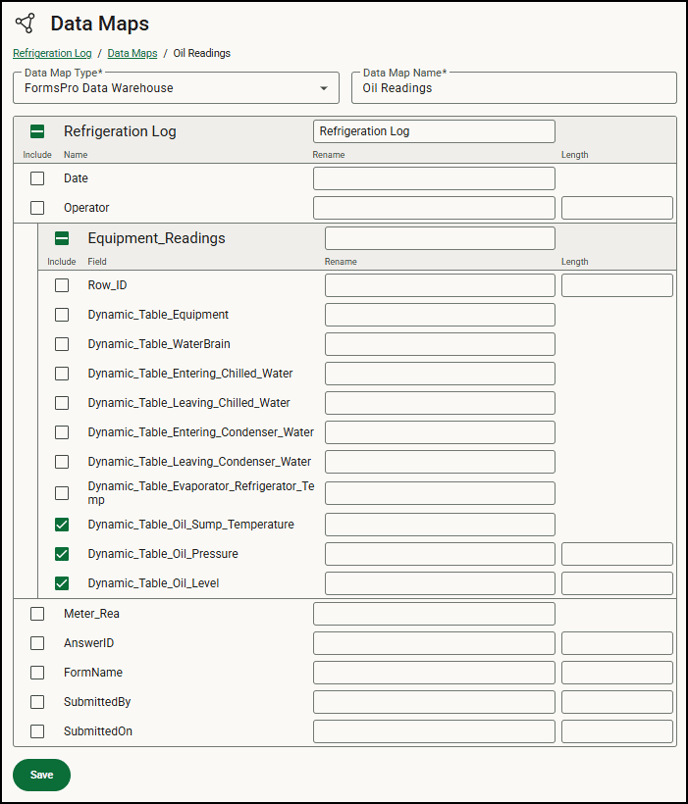
- In the Data Map Name field, enter a name for your data map. This represents the specific set of form data you're mapping. Since you can create multiple maps for the same form, use a name that will help you identify the purpose or contents of the map.
- Next to the form name, you'll see the table name that will be created in your SQL database. If no table name is entered, the form name is used, including any spaces. If you enter a custom table name, the data will be saved to a new table with that name. Changing the table name later will result in the creation of a new table. The old one will remain in your SQL database unless it's removed manually. The table is created when you save the data map, and data will begin populating it with each new form submission.
-
Mark the checkboxes next to the fields you want to include in your data map.
-
Fields are listed in the order they appear on the form.
-
You can also choose to include Submitted By and Submitted On fields to track who completed the form and when.
- Static table fields appear as individual fields, but dynamic tables and conditional fields create a separate table because of the nature of the recurring or conditional information. These appear in the database using the table name and can be renamed as well.
- If you’re mapping many forms, it's helpful to include the form name or some other identifier when renaming so that the table or conditional field has some context in the database list.
- You don’t need to add all the fields and, because you can create multiple maps for each form, you can create a map for some fields on your form and a separate one for others. If you know what you’ll be using the data for, it will help you create an appropriate map. For example, if you are required to report on water temperatures, but your form contains oil pressure information, you can create a data map for just the water temperature information needed on the report to simplify the data sorted out.
-
- You can rename any fields for use in the new database. We recommend shortening long form field names to a few words, such as when you use a long question as a field name but need to report on that data collected.
- Identify the field length for text fields if you’ll be using the data in an application with specified field lengths. Data is maxed to this length in the new database. For example, if you enter 200, the field size in the database will be 200, the data brought in will be truncated at 200 characters.
- Click Save.
- Back in the form designer, click
 (Save) to save changes made to the form. After the form is submitted, the database tables are created, and you can use other applications to query, view, or export the form data as you wish.
In this example, the dynamic table populated with the equipment readings is in a separate table:
- View the Data Maps Log to ensure the data map ran successfully. We recommend that you specify an email to send the Data Map event error log reports to ensure the right personnel is aware of the errors and failures.