![OmniByte - PNG Black Logo Oct 2021 (1).png]](https://help.omnibyte.com/hs-fs/hubfs/OmniByte%20-%20PNG%20Black%20Logo%20Oct%202021%20(1).png?height=50&name=OmniByte%20-%20PNG%20Black%20Logo%20Oct%202021%20(1).png)
There may be options on the Checkout workspace that you do not use. The Checkout Field Designer allows you to remove, rearrange, and add user-defined fields to the Checkout workspace to fit your business needs. Detailed information about how the sections and fields are used in the app can be found in the Checkout workspace section.
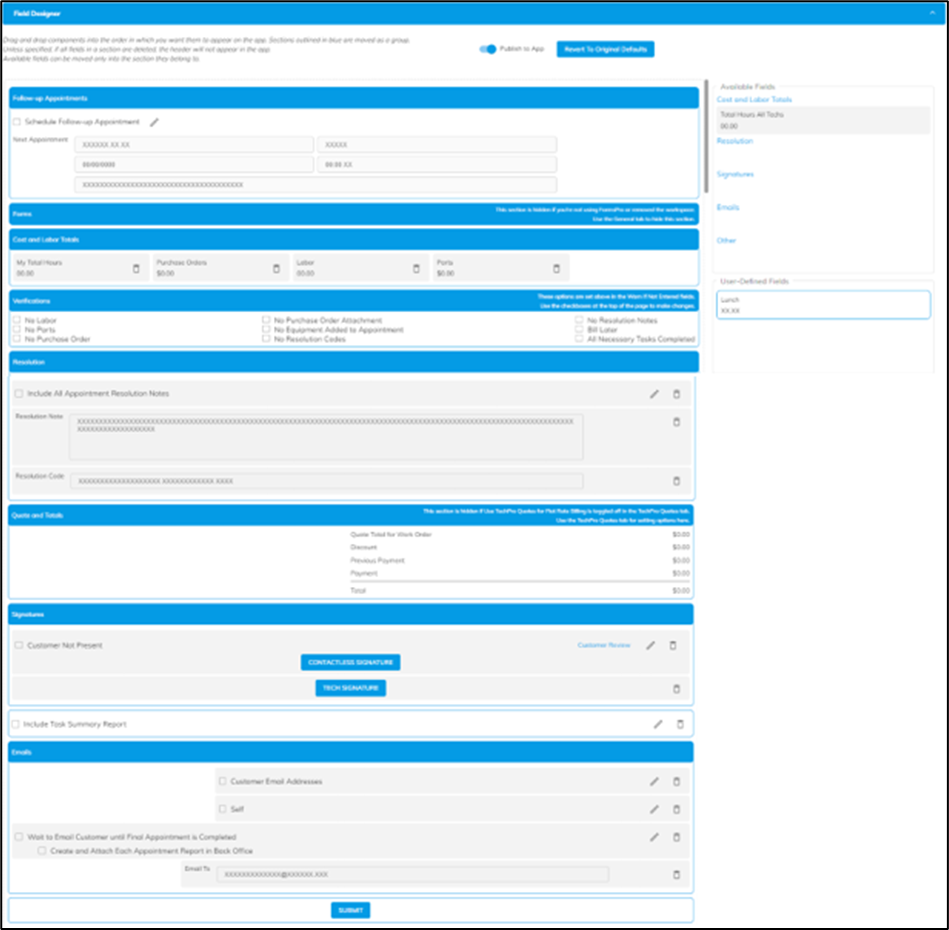
The Checkout Field Designer includes the following sections: Forms, Cost and Labor Totals, Follow-up Appointments, Verifications, Resolution, Quote and Totals, Signatures, and Emails.
With the Checkout Field Designer, you can:
- Rearrange Sections: Any sections (indicated with a blue outline) can be moved up or down.
- Add Fields: Drag and drop any field from the Available Fields or User Defined Fields list onto the design space to add fields to the Checkout workspace. You can only add fields to their appropriate sections. For example, the Purchase Orders dollar amount can only be added to the Cost and Labor Totals section.
- Remove Fields: Click the Delete icon to remove a field from the Checkout workspace. The field will appear in the Available Fields list so it can be added later, if needed. Fields that cannot be deleted because they contain pertinent information for the application to function appropriately do not have a Delete icon. If all components of a section are removed, the header will not appear in the app. For example, if you remove the components from the Signature section there will be no Signature heading in the app.
Note: Be careful when removing fields so that functionality is not removed. For example, if you remove the customer fields no customer signatures, regardless of contact, will be available.
- Rearrange Fields: Any fields that are dark gray can be moved within its respective section.
- Edit Fields: Some checkboxes and fields have an Edit icon. Click the Edit icon to edit certain aspects of a field:
- Default Marked: Toggle this option on to always display the checkbox as a default.
- Required: Toggle this option on to make the checkbox required.
- Locked: Toggle this option on if you don’t want a technician to be able to change the default setting. For example, you may want to lock the Customer Email Addresses option to prevent a user from marking or unmarking customer email addresses.