![OmniByte - PNG Black Logo Oct 2021 (1).png]](https://help.omnibyte.com/hs-fs/hubfs/OmniByte%20-%20PNG%20Black%20Logo%20Oct%202021%20(1).png?height=50&name=OmniByte%20-%20PNG%20Black%20Logo%20Oct%202021%20(1).png)
Adding multiple users is faster and easier when you import their information all at once. Instead of entering each user manually, use the spreadsheet template to add multiple users in a single upload.
Before uploading your spreadsheet, review the information carefully. Be sure to double-check each user’s email address and username for accuracy. Incorrect or duplicate information can cause issues during the import.
Once you’ve confirmed that the information is correct and your spreadsheet is complete, you’re ready to upload it and add your users to the system.
- From the Administration menu, click Users to open the Users page. In the upper right, click Import Users. The Import Users window appears.
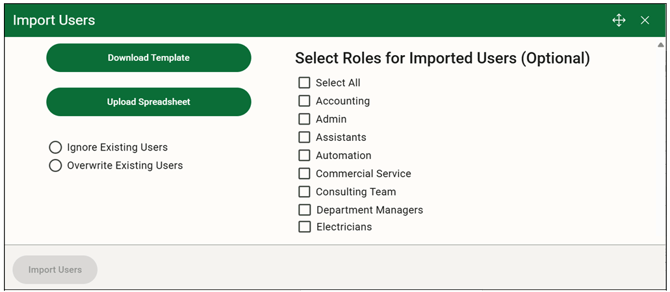
- Click Download Template. This provides an Excel template with the correct columns for the information needed for the import. Add the users to the rows in the template and save as an .xlsx file. (At this time, only .xlsx files are accepted in the import.)
- Click Upload Spreadsheet. Select the template you downloaded that contains the user information.
- To quickly assign roles to all users on the import, select roles from the list. The roles you choose are assigned to all users on the import. This is an optional step.
- Select whether you want to ignore or overwrite existing users with the import.
- Click Import Users to begin the import.
- Once the import is complete, verify and edit any of the newly added users.