![OmniByte - PNG Black Logo Oct 2021 (1).png]](https://help.omnibyte.com/hs-fs/hubfs/OmniByte%20-%20PNG%20Black%20Logo%20Oct%202021%20(1).png?height=50&name=OmniByte%20-%20PNG%20Black%20Logo%20Oct%202021%20(1).png)
The Link Button Settings window is used to set up and edit the settings for a link button.
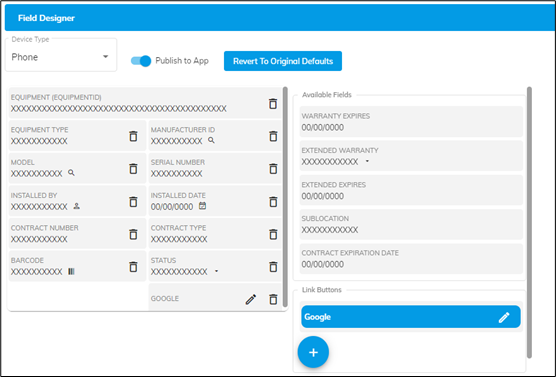
- From the menu on the left, click App Settings, then General. Scroll down to the Field Designer area and click the floating add button under the Link Buttons heading.

- Enter a label to identify the button that is being set up. This is the text you want to display on the button.
- Select the type of link button you are setting up. Options include:
HTTP Request POST
HTTP Request PUT
HTTP Request DELETE
HTTP Request PATCH
URL - From the Data Source for Authorization field, select the data connection you want to use for the link. The data connection contains the authorization information for the link (this is not applicable for the URL link type).
- In the Request URL field insert the URL for the link.
- Select the fields you want to insert into the workspace fields. For fields that are doubled up (such as Customer ID and Customer Name) each needs to be listed independently.
- Enter the request header and value (this is not applicable for the URL link type). If the data source authorization is entered as part of the request header, it overwrites the one in the Data Source for Authorization field.
- The Request Body section lists the fields in the workspace, including header fields, if designing for equipment or parts. The first checkbox is the name of the workspace, such as Equipment Workspace. The remaining checkboxes are those that you can include in the request. Rename the text as needed .
- Drag the link button(s) onto the design area.
- Save the link information.
Click Delete from TechPro to completely remove the link from TechPro. This button is unlike the trash icon that just removes it from the design and places it in the Link Buttons box.