![OmniByte - PNG Black Logo Oct 2021 (1).png]](https://help.omnibyte.com/hs-fs/hubfs/OmniByte%20-%20PNG%20Black%20Logo%20Oct%202021%20(1).png?height=50&name=OmniByte%20-%20PNG%20Black%20Logo%20Oct%202021%20(1).png)
User-defined fields are used to add fields directly from SQL queries to TechPro. Once you create these fields, they are placed onto the workspaces using the Field Designer.
Only one user-defined field can be added per workspace. However, your query can return as many individual fields as you’d like. For example, you can compose a query that gets the Appointment Description, User Defined 1A, and any number of additional fields you want to add to the Appointments list. They’re all grouped together as one user-defined field name but are added individually to the workspace.
First, you’ll add the user-defined fields to the TechPro Admin site. A user-defined field can be added for appointments, equipment, and parts.
Note: When you add fields to appointments, the fields appear in both the Appointments list and in the header that appears above each workspace.
- From the menu on the left, click User-Defined Fields, then Create New Field.
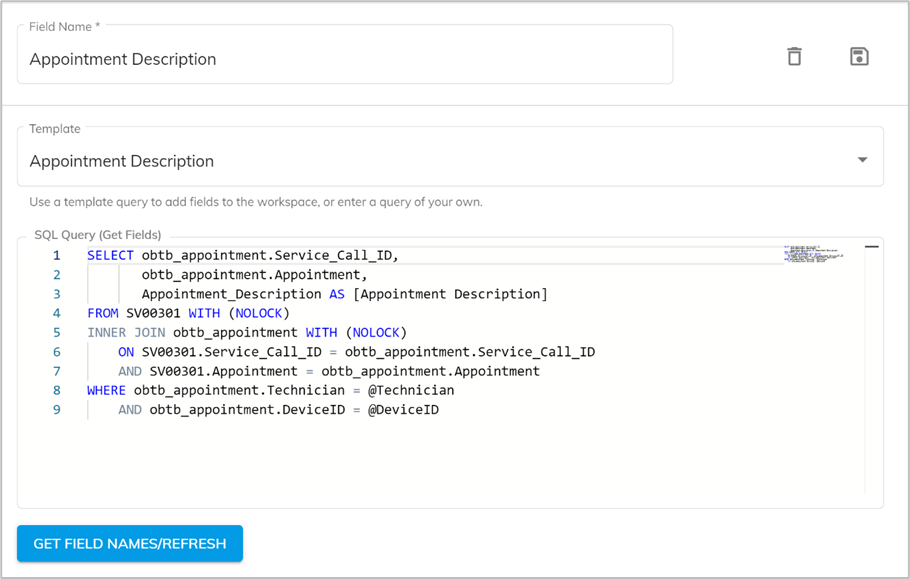
- In the Field Name field, enter a name for your user-defined field. This helps you identify the field in the list of previously set up user-defined fields in the menu list. Each user-defined field can be comprised using a query that returns several fields. Each can be individually added to the workspace but are grouped under a single name here.
- Select a template query to help you compose a similar query or compose a query to get the fields you want to use for the user defined field, and edit the template as needed. When composing your query, include key fields from the table to associate to the workspace so that the appropriate key mapping can be made (see step 4).
TIP: Include ‘WITH (NOLOCK)’ after all tables in your query. By default, in SQL, retrieving data reads only committed data, so the query must wait for data that is being written until it can return. When you use WITH (NOLOCK), this tells it to get data regardless of any other queries that are modifying it. This helps prevent deadlocks and uses less memory; however, it is possible to get a "dirty read," which means that you may read data that is being altered.
- Click Get Field Names/Refresh. This will get the fields from the query and list them in the Field Names list. Click this every time you modify the query to refresh the Field Names list.
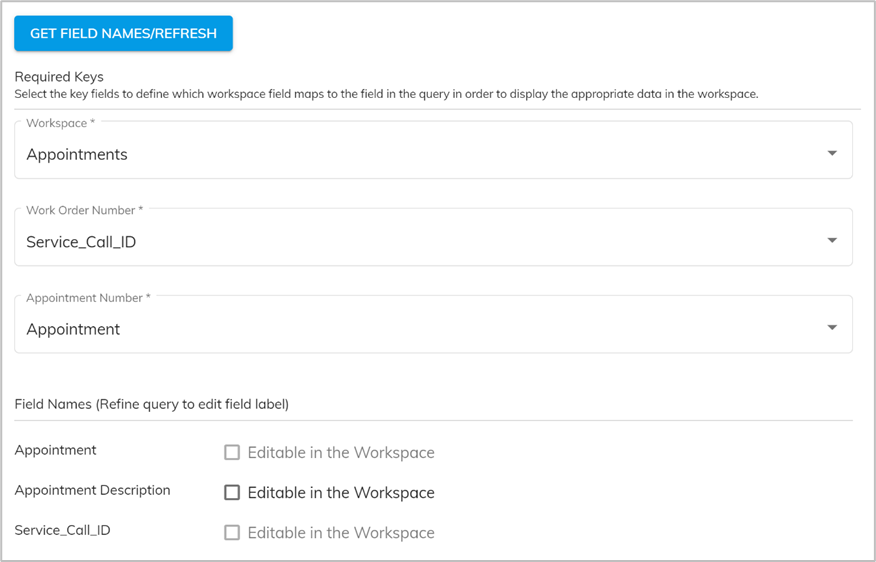
- Use the Required Keys fields to associate the workspace fields with the fields from the query so that the appropriate data for the new fields are shown in the workspace.
As fields are mapped, they become unavailable for adding to the workspace from the field designer, and the checkbox for editable is disabled. (Since they’re key fields for the workspace, they are already part of TechPro, and don’t need to be added to the workspaces.)
- In the Workspace list, select the workspace that the user-defined fields from the query will be added to. Only Appointments, Equipment, Parts and Checklist are available.
- Depending on your selection, the next fields change. You will need to select the key field in your query to associate with the key field(s) on the workspace.
- If you want to allow technicians to enter data in the field from the app, mark the Editable in the Workspace box next to each field.
If the fields you added are display only, click Save and the fields are available in the User Defined Fields box in the Field Designer to add to the workspace.
The following illustration uses a different get fields query to show an appropriate example for the update fields query:
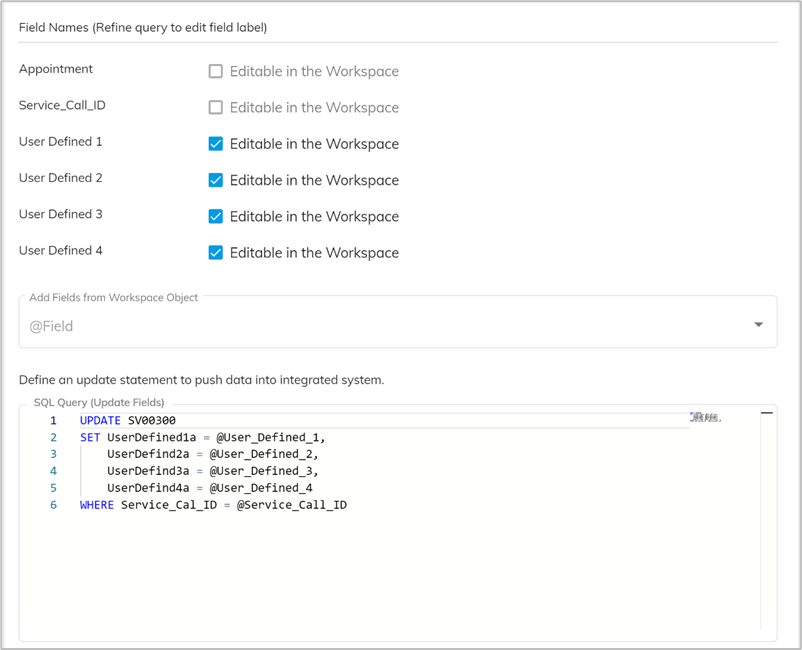
- Compose a query to update fields in the appropriate table. Click Save. The templates provided may help you with your query if you’re unsure where to start. User-defined fields that push data will simply update the database. Any event triggers will need to be handled separately.